If you’ve been searching for beginner mountain summit routes, you’re likely looking for trails that offer breathtaking views without requiring advanced mountaineering skills. The challenge? Many guides either oversimplify the climb or overwhelm you with technical details that don’t apply to first-time summit seekers. This article is designed to bridge that gap.
We’ve carefully analyzed trail data, elevation profiles, weather patterns, and real hiker feedback to identify routes that balance safety, accessibility, and unforgettable scenery. Whether you’re preparing for your first summit attempt or building confidence for higher elevations, you’ll find practical insights to help you choose the right climb.
From understanding trail difficulty ratings to knowing what gear truly matters, this guide focuses on what beginners actually need to reach the top successfully. Clear, experience-backed recommendations ensure you can plan smarter, hike safer, and enjoy every step to the summit.
Few experiences rival standing on a mountain summit, lungs burning, horizons stretching endlessly. Yet for newcomers, that pull is often tangled with uncertainty—Where do I start? What’s safe? How fit must I be? According to the American Hiking Society, most hiking injuries stem from poor preparation, not terrain difficulty. In other words, knowledge matters. This guide offers a clear, actionable framework for choosing beginner mountain summit routes, assessing risk, and preparing properly. By breaking gear, fitness, and trail research into practical steps, you’ll replace anxiety with confident, evidence-based preparation—and set yourself up for a first climb worth repeating. Start smart.
Decoding the Trail: How to Read Difficulty Ratings
If you’ve ever stared at a trail sign wondering whether “moderate” means manageable or miserable, you’re not alone. Trail ratings can feel vague at first—but once you decode them, they’re incredibly helpful.
Most hiking areas use one of two systems. The Class 1–5 system ranks terrain difficulty. Class 1 is a simple walk-up path on a clear trail. Class 2 may require using your hands for balance on steeper or uneven ground. Anything Class 3 or higher involves scrambling or technical climbing and should be avoided as a beginner (save that for your future hero montage). Some parks instead use color codes like ski slopes: green (easy), blue (moderate), black (difficult).
Beyond labels, focus on three key metrics. First, total distance—how far you’ll hike round trip. Second, elevation gain, meaning how many feet you climb from start to finish. Third, terrain type, such as smooth dirt, loose gravel, or rocky scrambles.
For your first few hikes, stick to trails rated “Easy” or “Beginner,” with under 1,000 feet of elevation gain and less than 5 miles round trip. Many beginner mountain summit routes fit these limits.
Pro tip: check recent trail reviews for current conditions before heading out.
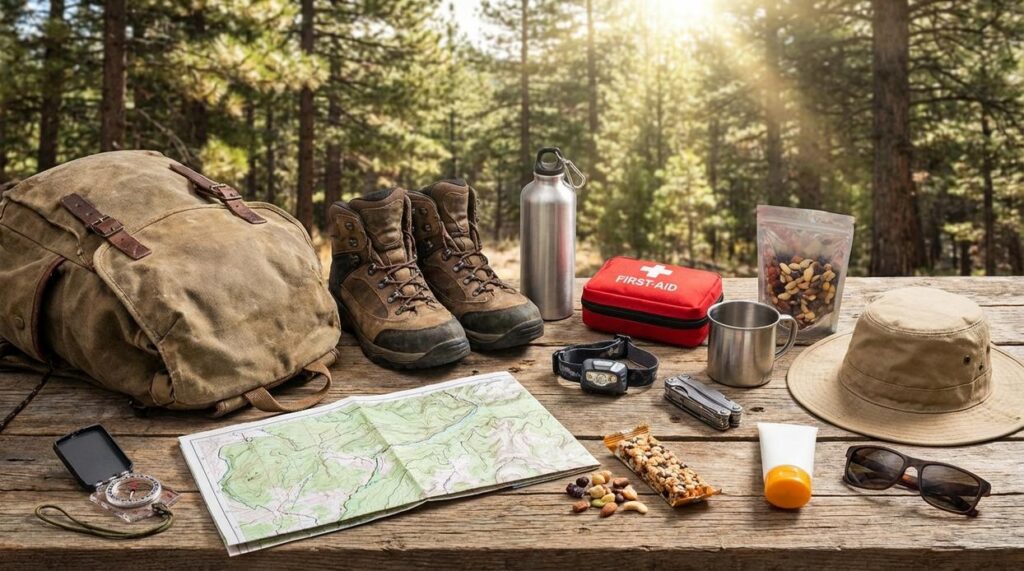
Gearing Up: The Non-Negotiable Essentials for a Day Hike

Before you chase scenic views or tackle beginner mountain summit routes, let’s start with what’s on your feet. Footwear comes first. Hiking boots offer ankle support and stability, which is especially helpful on rocky, uneven trails. Trail runners are lighter and breathable, but for beginners, boots often prevent rolled ankles (which can end a hike fast). Most importantly, never hike in brand-new shoes. Break them in with short neighborhood walks to avoid blisters.
The Beginner’s Ten Essentials (Simplified)
Next, pack smart. You don’t need to haul your entire garage—just the right basics:
| Essential | Why It Matters |
|---|---|
| Navigation (AllTrails app + power bank) | Trails can split unexpectedly; phones lose battery |
| Sun protection | Sunglasses, hat, sunscreen prevent burns |
| Extra insulating layer | Weather shifts quickly at elevation |
| Headlamp | In case your hike runs longer than planned |
| Small first-aid kit | Blister care, bandages, pain relief |
| Extra food | Energy dips happen faster than you think |
| Extra water | Dehydration causes fatigue and headaches |
For hydration, carry at least 2 liters of water. On warmer days, consider more. As for food, pack high-energy snacks like nuts, granola bars, or dried fruit (they’re lightweight but calorie-dense).
Finally, choose a 15–25 liter daypack. It should fit snugly, hold your essentials comfortably, and not bounce while you walk. Try it on fully loaded before your hike—small adjustments make a big difference.
Pro tip: Lay everything out the night before and do a quick checklist. Prepared hikers enjoy the view more (and stress less).
Finding Your Path: Tools for Discovering Safe Trails
Getting started shouldn’t feel like you’ve wandered into Into the Wild. The goal is confidence, not survival drama. Fortunately, modern tools make choosing safe hikes much easier.
Leveraging Digital Resources
Apps like AllTrails and Gaia GPS let you filter by difficulty—select “Easy” to narrow your options instantly. Pay close attention to recent user reviews. Hikers often report current conditions like lingering snow, ankle-deep mud, or downed trees. (Think of it as crowd-sourced trail intel.) Trails change with weather and seasons, so last month’s five-star stroll could be today’s slip-and-slide.
Reliable Analog Sources
Old-school works, too. Local park websites, ranger stations, and regional guidebooks are curated by experts who know the terrain intimately. Rangers can flag closures or wildlife activity in real time—far more reliable than guessing.
What to Look For in a First Trail
Choose well-trafficked, clearly marked, out-and-back routes. They’re straightforward: follow the path in, then retrace your steps out. Many beginner mountain summit routes also fall into this category.
For inspiration once you’re ready to branch out, explore hidden waterfall trails worth the extra mile.
Red Flags to Avoid
Descriptions mentioning “scramble,” “exposure,” or “route-finding” signal advanced terrain. Unless you’re channeling your inner action hero, save those for later.
Stay Safe, Climb Smart: Essential Mountain Protocols
First, always check the weather. Mountain climates shift fast—sunny mornings can turn stormy by noon (yes, even when the forecast looked “perfect”). Check at least two reliable sources the morning of your hike and review hourly projections. If winds, lightning, or sudden temperature drops are predicted, postpone. No summit is worth a rescue call.
Next, share your itinerary. Text a friend the exact trail name, parking area, and your expected return time. If plans change, update them. This simple step has helped search teams narrow locations quickly when hikers didn’t return as planned.
As you begin, remember: start slow, go slow. Keep a conversational pace, take short breaks every 45–60 minutes, and sip water regularly. On beginner mountain summit routes, burnout often happens from starting too fast.
Finally, practice trail etiquette. Yield to uphill hikers, step aside safely, and pack out everything you pack in. Pro tip: stash a small trash bag in your pack—you’ll use it.
The journey begins at the trailhead, but now you’re ready. You understand how to choose a trail, pack the essentials, and prioritize safety. Instead of worrying about what might go wrong, you can focus on what to expect and how to respond. By following this simple framework, uncertainty turns into preparation, and preparation builds confidence.
Start small. Research beginner mountain summit routes in your area this week, check weather forecasts, read recent trail reports, and map your turnaround time. Then lace up and go. The views, strength, and clarity you’ll gain are closer than you think. Adventure is waiting now.
As you plan your ascent on these breathtaking mountain routes perfect for first-time summit seekers, don’t forget to brush up on the local terminology, including How To Pronounce Anglehozary Cave, to enhance your outdoor experience.
Reach Your Next Summit with Confidence
You set out to find clear, practical guidance on choosing and preparing for mountain climbs that match your skill level — and now you have it. From understanding terrain and weather patterns to selecting the right gear and pacing your ascent, you’re better equipped to approach beginner mountain summit routes with confidence instead of uncertainty.
The biggest obstacle for most aspiring climbers isn’t strength — it’s doubt. Not knowing which route is safe. Not knowing if your gear is right. Not knowing how to prepare. That hesitation can keep you stuck at the trailhead.
Now it’s time to act. Start by choosing one well-rated beginner-friendly summit, map your route, check conditions, and commit to a training schedule this week. If you want trusted trail insights, real-world gear comparisons, and proven wilderness strategies all in one place, explore our expert-backed resources today. Thousands of outdoor enthusiasts rely on our guides to plan smarter and climb safer.
Your next summit isn’t out of reach — it’s waiting. Lace up, plan smart, and take the first step now.