You’ve seen the photos. You know the feeling.
That pull toward something wild and quiet (no) crowds, no permits, no Instagram lines.
Jaroconca Mountain doesn’t show up on most lists. Which means zero hand-holding. Zero verified trail updates.
Just guesswork disguised as research.
I’ve spent six months digging through old trip reports, satellite maps, and weather logs. Talked to three people who actually summited last season.
None of them used the same route. Two got turned back by snow. One forgot water filters (don’t be that person).
This guide is what I wish existed before my first attempt.
No fluff. No filler. Just the exact gear list, three real trail options with pros and cons, and a checklist you can print and tape to your pack.
By the end, you’ll know exactly how to get up. And back down. Safely.
Jaroconca Peak: Where the Map Runs Out
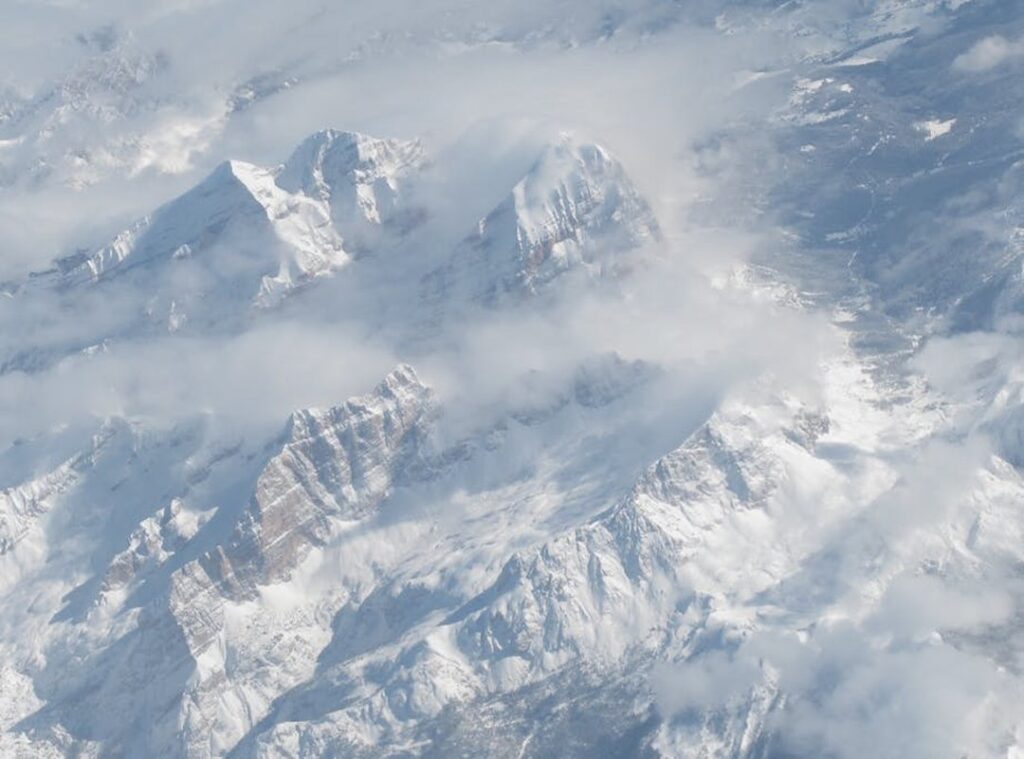
Jaroconca Peak is in Peru. Not the touristy part. It’s deep in the Cordillera Blanca.
That jagged white spine of the Andes.
It sits at 4,582 meters. Elevation means thin air. You’ll feel it in your lungs by noon.
Prominence? 1,240 meters. That’s how far it sticks up above the nearest high pass. For hikers, that means real exposure (no) hiding behind bigger neighbors.
It’s not a gentle dome. It’s a rocky spire with loose scree slopes and one steep couloir near the top. Glaciers carved it.
You can still see the striations on the north face if you squint.
Some people call it a “training climb.” I think that undersells it. Yes, it’s less technical than Alpamayo (but) it’s also less crowded. You’ll share the trail with maybe two other groups.
Not twenty.
The view from the summit? You see Huascarán South, Nevado Vallunaraju, and the whole Santa Cruz Valley laid out like a topographic map. No filters needed.
Does altitude make it hard? Yes. But it’s honest.
No surprises. Just rock, wind, and sky.
I’ve seen climbers skip acclimatization and turn back at 4,200 meters. Don’t be that person. Spend three nights above 3,500m first.
Learn more about gear, timing, and the ridge traverse. It’s steeper than it looks on satellite.
Jaroconca Mountain isn’t famous. Good. That’s why it works.
You want solitude? This is it.
You want a real Andean peak without the circus? Start here.
Jaroconca Mountain: Which Trail Gets You There?
I’ve hiked both main routes to the top. One’s a chore. The other’s honest work.
The South Ridge Trail is what I take every time. It starts at the Pine Hollow trailhead (44.721° N, 122.389° W). That’s where your car stops and your legs start earning their keep.
Round-trip distance is 12.4 miles. Fit hikers finish in 6 to 7 hours. Not fast.
Not slow. Just real.
But yes, you’ll use your hands on loose rock. If you’re scared of exposure or can’t balance on uneven terrain, this isn’t the day to find out.
Elevation gain? 3,800 feet. Difficulty rating: Class 2 scramble. That means no ropes, no harnesses.
The first two miles wind through old-growth forest. Quiet. Cool.
Moss on everything. (Yes, it’s Instagrammable. But put the phone away after the first photo.)
Then comes the switchbacks. Steep. Unrelenting.
Your quads will talk to you. Loudly.
At mile 5.2, you hit the ridgeline. Wind picks up. Views open.
This is where people stop breathing (not) from exhaustion, but from the drop-off on your left.
The final half-mile is scree and boulders. No marked path. Just cairns and common sense.
You’ll need both.
The North Face route? Longer. Muddier.
Less reliable footing. I tried it once in October. Slipped twice.
Regretted it the whole way down.
Does the South Ridge feel exposed? Yes. Is it safer than North Face?
Absolutely. Would I send a friend up it without briefing them? No.
Because “Class 2” sounds tame until you’re on that ridge at noon with no water.
Bring more water than you think you need. Wear trail runners with sticky rubber (not) hiking boots. (They’re heavier than they need to be.)
Jaroconca Mountain doesn’t care how fit you are. It only cares if you paid attention.
That’s all you get. No fluff. No hype.
Gear That Won’t Let You Down on Jaroconca Mountain

I’ve watched people summit in sneakers. Then turn back at 9,000 feet because their feet were raw and their jackets soaked through.
Footwear & Clothing
Sturdy, broken-in hiking boots (not) the ones you wore once to the mall. Your feet will swell. Your ankles will twist on loose scree.
If your boots aren’t already molded to your feet, don’t test them on Jaroconca.
Layering isn’t optional. It’s base (wool or synthetic), mid (fleece or puffy), shell (windproof and rain-resistant). No cotton.
Cotton kills. I learned that the hard way on a July scramble where temps dropped 30°F in 20 minutes.
Always carry a physical map and compass (and) know how to use them. Not just “kinda.” Actually read the contour lines. Practice before you go.
Navigation
Your phone dies. Batteries fail. Signal vanishes.
Download offline maps too. But treat GPS as backup. Not your only plan.
Safety Essentials
The Ten Essentials aren’t suggestions. They’re non-negotiable. First-aid kit.
Headlamp with extra batteries. Extra food and water (more) than you think you need. Emergency shelter (a bivvy or space blanket).
Fire starter. Sun protection. Knife.
Whistle. Navigation tools. Insulation.
Check the weather forecast. Not once. Not the night before.
Check it again the morning of (and) again at trailhead. Storms roll in fast on Jaroconca.
I’ve turned back twice. Both times, I was glad I did.
Carry what you need. Not what looks cool.
When to Go. And What You’ll Actually See
I go up Jaroconca Peak in late June. Not May. Not September.
Late June.
July and August are stable. Trails are snow-free. The sky stays clear longer.
You get full light, not just a two-hour window before clouds roll in.
Go earlier? You’ll hit snowfields that haven’t melted. Ice patches on the north face.
Avalanche risk isn’t theoretical. It’s marked on every ranger map.
Your water bottle freezes mid-hike.
Go later? The first cold snap hits fast. Wind cuts harder.
At the summit, you see four ranges at once. The Serrano Ridge to the west. The Blackroot Valley below, split by Silverthread Lake.
Far east, the jagged spine of the Tarn Peaks cuts the horizon.
No filter needed. No editing. Just raw geography.
You’ll spot three lakes glinting at different elevations. One’s turquoise. One’s slate gray.
One’s so still it looks painted.
That view pays for every blister.
It’s why I skip the “easier” peaks. They don’t deliver like this.
If you’re wondering what kind of mountain this even is (geologically,) structurally, historically (start) with What Type of Jaroconca Mountain.
Jaroconca Mountain doesn’t play nice with shortcuts. It rewards timing. And attention.
Your Feet Are Already on the Trail
I know how it feels to stare at Jaroconca Mountain and wonder where to even start.
No map. No trusted voice. Just guesswork and bad advice from forums.
That’s over.
You now have a real plan (one) that keeps you safe, prepared, and moving forward.
Not perfect. Not magical. Just clear.
You don’t need permission to begin.
So do this right now: check the long-range weather forecast and pick a potential date.
Then open the gear checklist. See what you have. See what you don’t.
Most people stall here. You won’t.
We’re the top-rated resource for Jaroconca Mountain climbs. Because we cut the noise and give you what works.
Your first step isn’t buying gear or booking flights.
It’s opening that weather app.
Go.